Saturday, September 29, 2012

3D Printer related Video 7


3D Printer related Video 6


Saturday, September 22, 2012

Calculating the Value of a 3D Printed Model in Architecture

This is quoted from http://blog.objet.com/2012/08/30/the-value-of-rapid-prototyping-in-architecture/ .

August 30, 2012


By Piet Meijs, Senior 3D Expert, Rietveld Architects, New York.

In May of this year, I joined a friend of mine, Justin Levitz from NRI in New York, as a guest speaker on his continuing education presentation for the American Institute of Architects (AIA/CES). We’ve done several presentations together, so it gave me an opportunity to reflect on why we use 3D printing in our office. The most asked question during the presentations is always: “How much does it cost?” But in my opinion that is the wrong question. The correct question should be “What is the value?”
The Value of a 3D Model
In 2008, I attended and presented at the North American Objet User Group Meeting in San Diego. Another speaker there was Michael Schrage, who spoke about the value of a 3D printed model. His presentation was very much geared towards industrial design, and at the time, so I didn’t fully grasp his message.
He explained to us that the value of a model is not equal to its cost. The cost of a model is the sum of its parts, usually material and labor. But what is then the value of a model? The value lies in its ability to communicate a design.
A 3D printed model can be used to test out several design options. These are the traditional prototypes. But when the designer has picked a solution for a specific design problem, he/she usually needs to convince someone to move ahead with that design – either his superior or a client.
Of course, the designer is already convinced that the design he/she puts forward is the best solution. This is because they’ve worked on the design for an extended amount of time, has tried several options, and maybe even prototyped various versions throughout the design process. So all that’s needed now is to convince the boss or the client that this is the best solution.
Normally, these design presentations are limited in time. The designer only has a one-off opportunity to convince the boss or the client of the quality of the design. Therefore, the better the presentation, the more likely they will buy-in. Besides more traditional 2D drawings and images, a 3D printed model can be a great tool for this kind of presentation.
Objet 3D Printed Architecture Model – Side Elevated View
So if the model helps the client or the superior to understand the design better and be convinced that this is the right solution, the project can move forward to the next phase, and that is where the value lies.
What if the designer is not able to convince the client or superior? The designer would then have to then go back and either change the design or change the presentation. This delay in the process not only costs lots of extra money, but also results in extra hours of work for the designer, extra meetings with the client or superior, greater financing costs, and most probably a delay in project completion time.
This is not to say that with a model, a design will always be approved, but what is certain is that the more information there is, the less likely it is that wrong decisions will be made that could delay the project.
This type of value is impossible to quantify in simple purchase terms, because we will never know what “did not happen”; however, every designer has had to deal at some point with clients or superiors that changed their previous decisions because they were made on a basis of misinformation or misunderstanding. And these wrong decisions can add up to become very costly. The costs “not incurred” due to the presence of the information in the 3D model is therefore the value of the 3D printed model and the technology.
Summary
The value of a 3D printed model lies in its ability to communicate an idea. With social media all around us these days, the amount of visual stimulation has increased dramatically, and people’s attention spans have been brought down to 140 characters. As a designer, if you cannot get your point across in a very short window, you will lose the focus of the meeting.  An accurate, detailed scale model, as provided by a high resolution 3D printer, has the ability to communicate a ton of information in the blink of an eye, and can therefore be incredibly valuable for both designers and architects alike.
Objet 3D Printed Architecture Model – Plan View

Showing Off Some Ultra-Fine 3D Printing Details

This is quoted from http://blog.objet.com/2012/06/11/showing-off-some-ultra-fine-3d-printing-details/ .

June 11, 2012

When it comes to architectural 3D modeling, 3D print resolution is everything. Check out the ultra-fine details on this 3D printed victory arch – printed on the Objet Eden or Connex range of 3D printer in 16 micron detail using clear transparent material. (Smaller versions of this model can now also be printed on the new Objet30 Pro Desktop 3D printer – the first desktop system in the world to also use clear transparent material).
3D Printed Arch – Created on an Objet 3D Printer in Clear Transparent Material

3D print Architecture Prototyping and The Software Debate – by Piet Meijs

This is quoted from http://blog.objet.com/2012/05/03/architecture-prototyping-and-the-software-debate-by-piet-meijs/ .

May 3, 2012

Objet guest blogger Piet Meijs is Senior 3D Expert at Rietveld Architects, New York.
The most asked question I get from architects is: “What software do you use?”. The answer is always long since we don’t like to limit ourselves to just one solution, but we of course have a preferred workflow, which I’ve done my best to describe in full below.
3D Computer Modeling
Like most architectural firms, we do all of our drafting on the computer. (We also do our hand-sketching on computers, but that’s a whole different blog post…). At Rietveld, our main software package is Graphisoft’s ArchiCAD. ArchiCAD is what’s called a “Building Information Model” (BIM) software. This means that the model becomes a database containing geometrical as well as non-geometrical information of the design. The non-geometrical information consists of data such as cost, quantity, type, etc. We will come back to this later, but let’s first talk about the geometrical information.
It seems obvious these days that a design is drawn in three dimensions (3D). However, not too long ago, most architectural firms only drew in two dimensions (2D) and some still do. Advances in software however have made it a lot easier to draw in 3D. This became a huge advantage for when you needed to make a 3D presentation (or rendering) for a client. No longer did you have to create a separate file for rendering a 3D image in a software that did not have the capability to represent that design in 2D.
So, now that we have our design drawn in a software package that can handle 2D and 3D representation, wouldn’t it be great if we could hit “3D print” and have our design 3D printed to scale? That would be great, but unfortunately the technology isn’t there yet. We will come back to that later as well.

Just as with the beginnings of 3D rendering where you had to make a separate file for every different usage, the same also holds true here. Since the technology of 3D printing is still quite new, the software that architects use hasn’t caught up yet. Once you accept this, it opens up a whole new array of possibilities, since you are no longer tied to your main software package.
Our Workflow
Our workflow was created mostly by looking at what we knew at that time, and what we already had available to us in our office. But it is by no means the best, or only, workflow.
When we start a project, the basic geometry is drawn up in 2D lines in ArchiCAD. This project geometry serves as the basis for all the 3D computer models that will be made, whether it’s for 2D drawings, 3D renderings, or a 3D print model. For the 3D print model, we like to use SketchUp. This seemingly basic program is actually very suitable for 3D printing. The geometry it creates is very simple, and therefore very clean. Bad prints are almost always caused by bad geometry. Once the model is complete, it gets exported to Rhino where we apply a few grasshopper tricks to texture certain surfaces and to check if our geometry is watertight. Sometimes certain surfaces don’t get exported or were accidentally deleted in SketchUp. Rhino has plugins to detect these “naked edges”. Once the model is done in Rhino we export the model as an “stl” file. This file gets imported into the Objet 3D printer’s software which handles the actual 3D printing of the model.
As said before, this is just one solution. Any program that can built watertight meshes can be used. Even NURBS modelers can be used, as long as you keep in mind that the model becomes a polygon model when exported to an “stl” file.
The Future
I started this post with talking about the changes architecture software went through to accommodate the need for 3D representations of the design. Software manufactures worked hard to integrate 2D and 3D into one software package, and they have succeeded. So the next step should be the integration of 3D printing.
I like to use the example of ArchiCAD. ArchiCAD has a library filled with pre-built library parts. These library parts range from furniture to columns, and everything in between. The best thing about these library parts is that they have multiple appearances. They have a plan view, elevation view, section view, and even a 3D view. Also, you can make the library parts appear different in different scaled drawings. A door frame in a 1:100 plan can be a simple box, but can show up very complex in a 1:5 detail drawing. I would like to see this same logic used to create 3D printable library parts.
Since this technology is already available for 2D, it’s only a matter of time until this will be available for 3D. All you’ll have to do then is press “3D print”.

Fenway Park Stadium Gets 3D Printed!

This is quoted from http://blog.objet.com/2012/04/18/fenway-park-stadium-gets-3d-printed/ .

April 18, 2012


As one of only two ‘classic’ ballparks still in use, Fenway Park is today a national icon, having served as the home of the Boston Red Sox for over a century. So to celebrate the centennial we decided to 3D print..er..the entire park.
The staff at Objet’s Boston office managed to get hold of some of the blueprints from the Boston Inspectional Services Department. Together with some recent photos of the park they were then able to create an STL file for 3D printing on the Objet Connex multi-material 3D printer! Check out the amazing photos below.

About the model:
- The 3D printed model itself was printed in 40 seperate interlocking pieces on the Objet Connex500 – Objet’s largest multi-material 3D printer.
- When put together the final assembly weights about 105 pounds.
- The final 3D model shows off the fantastic print resolution of the Objet machine to great effect. Some of the noticeable details include Pesky’s Pole, Ted Williams’ red seat, the Green Monster (including seats atop).
- The model also includes the exact number of lights, concourses, dugouts and bullpens.
Where you can see it:
You can follow the amazing 3D printed Fenway model around its ‘victory tour’ of Boston starting tomorrow, Thursday the 19th.
  • Morning, April 19th - Check out the 3D printed Fenway model on Fox 25 Morning News (at around 9.30 am)
  • Evening, April 19th - See the 3D printed Fenway model at the Game On! bar/restaurant opposite Fenway park (from 6pm – 9pm)
  • Afternoon, April 20th - the model will be on display at the Museum of Science in Boston for a 3D printing demo (at 12.30 midday)
For those on twitter, use hashtag #3dPrintedFenway
Following these events the 3D model will be donated to the Boston Sports Museum at the TD Garden. In the meantime, I’ve included below some great snaps of the final 3D printed model being assembled by team. Enjoy!

(Above) The seperate 3D printed pieces laid out and ready for assembly.

(Above) Starting to put the pieces together.

(Above) Almost there!

(Above and Below) Ta-daah! The completed 3D printed model - all 105 pounds of it. Check out that detail, especially on the lights!

3D Print the Impossible! Turning Escher Drawings into Real 3D Models

This is quoted from http://blog.objet.com/2012/08/28/3d-print-the-impossible-turning-escher-drawings-in-real-3d-models/ .


This video has now gone viral with over 200,000 hits on YouTube since it’s release this August. And I can see why! The researchers at the Technion – Israel’s famous Institute of Technology, have used their own Objet 3D printer to re-create the impossible Escher Drawings as real, tangible 3D models.
Particularly intriguing is the 3D printed Belvedere (below), first produced as a 2D drawing in May 1958. In his original work, Escher drew a rectangular three-story building supported by a number of pillars that, at first glance, appears to be plausible. But on close inspection you see that those supporting pillars at the front appear to be supporting the back side of the top floor while those at the back appear to be supporting the front – an obvious paradox. You can see how this is solved in the “real” 3D world – by the clever manipulation of the viewer’s perspective…
For more on this project see Professor Gershon Elber’s ‘Escher for Real‘ project at the Computer Science Department, Technion.
Objet 3D Printed Escher Model in Rigid White Material


3D Printers Help Create a New Breed of Robots

This is quoted from http://blog.objet.com/2012/09/04/3d-printers-help-create-artificial-muscles-for-soft-robots/ .

September 4, 2012


Are We Now a Step Closer to Human-Like Androids Using 3D Printing?

If you haven’t yet heard, there’s a new advance in the field or robotics now taking shape – quite literally in fact. Known as ’Soft Robotics’, this emerging science aims to break down the physical differences that remain between humans and robots.
The ‘Human’ Challenge
Until now, robots have been hard-bodied and made of materials that are many times more rigid and strong than the soft tissues in our bodies. And as a result, they don’t resemble humans in anything other than general form. Peter Walters and David McGoran are two researchers at the University of West England, Bristol, who are working to change that.

Peter Walters and David McGoran
Working out of the 3D Printing Lab at the university’s Center for Fine Print Research, they’ve created an ‘artificial muscle’ that closely mimics the movement and function of tentacles that you’d find in an octopus or jellyfish. The artificial muscles are made from a Shape Memory Alloy material (Biometal) which contracts when heated by an electric current. The biometal wire is embedded inside a 3D printed tentacle arm which is able to move in various directions when stimulated.
Why 3D Printing?
3D printing is able to provide the complex shape, complete with cavities for the Biometal wires to run through, that would be difficult for conventional silicone molding to replicate. By directly 3D printing the tentacles, the researchers are able to cut out the molding stage altogether, speed up design iterations and easily make changes to the tentacle structures without the high price of changing the molding tools.

Functional Tentacle Created Using Biometal and Objet 3D Printed Flexible Material

The tenticles in these photos are created on an Objet 3D printer – the only technology in the world able to 3D print both rigid and rubber-like materials together within the same structure. The Objet-printed parts are the blue sections. These are actually made from Objet TangoPlus™ transparent rubber-like material which have then been dyed blue after 3D printing and cleaning.


Next Step: 3D Printed Androids?
Science Fiction writer Isaac Asimov first used the term ‘robotics’ in 1941. As one of my all-time favourite authors, his Robot and Foundation stories captured my imagination as a teenager. One of the central characters in these novels was a humanoid robot called ‘Daneel Olivaw’ who worked to help save humanity and establish a Galactic Empire through space. Daneel looked like a human being down to the smallest details, yet under his synthetic skin, Asimov described ‘wires and steel’.
With further advances using 3D printing and biometals, perhaps it won’t be too long before we see real working androids created using multi-material 3D printing. Using such a system would enable designers to combine rigid 3D printed bones and joints seamlessly connected to flexible 3D printed soft tissues – and all powered by biometal nerves and tendons, precisely nestled in the complex branch-ways within.
What next? Perhaps humaniod robots blasting into space to terraform Mars for human settlement?
Multi-Material 3D Printed Human Joint in Rigid and Rubber-like Materials. Created as a Single Seamless Structure with No Gluing by Students at Virginia Tech

For more on the 3D printed tentacle work, read Peter Walters’ and David McGoran’s academic paper, which they presented at IS&T Digital Fabrication 2011.

Incredible 3D Printed Octopod Underwater Vehicle

This is quoted from http://blog.objet.com/2012/08/06/incredible-3d-printed-octopod-underwater-vehicle/ .

This has to be one of the most incredibly lovingly-detailed 3D printed models I have ever seen! These pictures show a 3D printed mechanical octopus vehicle or ‘octopod’ created by Sean Charlesworth, and printed on the Objet Connex500 multi-material 3D printer.
The 3D printed model comes complete with working features, LED lighting and some fine detail work that, just thinking about it, makes me want to pull my own remaining hairs out, one by one.
Octopod – Featuring Rubber-like and Rigid Material Combinations
Along with the photos, the Objet blog now has the pleasure of bringing you the full interview transcript below, where I was able to ask Sean to fill in the gaps about his remarkable work:
(Sam Green): Sean, please tell us about your professional background and how you got into design?
(Seam Charlesworth): My undergrad was in Film & TV and I have spent the last 10 years repairing cameras and equipment for New York University. I recently finished a Masters at NYU in Digital Imaging and Design with a concentration in 3D modeling and printing. 3D printing really appealed to me since it combined hands on work and physical objects with digital design. The fact that I could build something like this with virtually no tools, molds and machinery was exciting.
Octopod – Inside Detail Including Opening/Closing Iris
(SG): Why the Octopod? What’s the history behind your passion for this project?
(SC): At the time I was planning a digital underwater scene for a lighting exercise and wanted to include some objects. I’m a hard-surface modeler and didn’t feel comfortable tackling creatures so decided to make some kind of craft but didn’t want a typical submarine, etc. I’m a big fan of the Nautilus sub from Disney’s “20,000 Leagues Under the Sea” because it had an animal-like look while remaining really mechanical. Using that as a springboard I came up with the Octopod and tried to design it to be as practical as possible while being fantastical. The underwater scene never did materialize but I ended up using the idea for my thesis.
(SG): What are the main challenges with creating a model such as this?
Fine Details of the Control Room – Printed in Different Objet Color Shades in a Single Print Step
(SC): Overall the biggest challenge was designing everything to fit together and work mechanically. Since my background is in modeling for the entertainment industry I was using Cinema 4D and Maya which are probably not the best choice when designing something so mechanical. I knew CAD would probably be a better choice but wanted to stick with what I know and also didn’t have the time to learn something new. This made things more challenging but was a valid workflow since so many different industries are using 3D printing now.
Of all the mechanical bits to work out, the tentacles were by far the hardest and required the most test prints. I knew the tentacles had to really come alive or the model would be a flop. I rejected traditional joints for various reasons and ended up printing a flexible core with Objet’s rubber-like Tango material and fusing Objet Vero rigid knuckles to it for detail. I modeled a small shaft down the center and inserted brass armature wires afterward so the tentacles could be posed dramatically. It took about four versions to get it right.
Octopod – Objet Connex 3D Printed Opening Doors and LED Light
(SG): What’s were the main advantages of using the Objet Connex machine for this project?
(SC): I found the Objet Connex to be great for this project due to the multiple materials. While the ABS-like Digital Material would have ultimately been the best choice structurally, I didn’t want to deal with painting the model. I chose to do most of it with the Black and White Vero materials since I could digitally mix them and have something that looked great right out of the printer. I was also really happy with the resolution and precision of the parts.
I have to thank the NYU Advanced Media Studio for helping me through this complicated project. I was lucky that I could sit down with them and brainstorm solutions and workflows one-on-one. I think that with 3D printing reaching the masses we need to see more services like this, which can guide you through the process.
(SG): What do you plan to do with the Objet Connex system in future?
Sean Charlesworth
(SC): I plan on reprinting some improved parts for the Octopod and adding some details that I didn’t have time for initially. After that I would like to do a project using the ABS-like Digital Material and try some finishing and painting techniques on it.
(SG): Thanks for your time and wishing you all the very best in your future endeavors!
(SC): Thank you!
I highly recommend a visit to Sean’s blog where you can see a fantastic time-lapse of the entire octopod build process and some more photographs, complete with explanatory captions.
Read more about Objet Digital Materials and ABS-like Digital Material.

3D Printing Material Distributions

This is quoted from http://blog.objet.com/2012/06/19/3d-printing-material-distributions/ .

If you’ve ever opened up a three-dimensional modeling application (such as Rhino, 3D Max, Maya, SolidWorks, or Sketchup), chances are you’ve had some experience with ‘Boundary Representations’ (or Breps for short).  Whether you knew their technical name or not, almost all Computer Aided Design tools used today are built on the paradigm of Breps, where a “solid” object is that which is enclosed by a set of boundaries or surfaces.
The digital representation of these “solid” objects are often treated as discrete, and homogeneous – where there is a clear distinction between what is “inside” and what is “outside” this boundary envelope.  Yet, there are other ways to consider digital material, most notably using a technique called topology optimization.
Topology optimization is a method often used in engineering to produce optimal lightweight structures.  We start with a volume of material and redistribute [ie. weaken or strengthen] the material at different points throughout the volume until we achieve an optimal form.
A side effect of this procedure is a suggestion of a structure that is neither hard nor soft but is made out of a ‘virtual material’ of gradually varying stiffness.
Leveraging multi-material 3d printing technology (like that provided by Objet’s Connex multi-material 3D printer), we can directly materialize a new type of ‘fuzzy’ structural system where a soft transparent rubbery material might enclose a series of nested volume of increasing stiffness. These nested harder parts act like an embedded skeleton – but with the transitions between the hard and soft parts blurred.
For the first two experiments we wanted to revisit some known forms and try to reinterpret them through this new prototyping technique [ie. topology optimization coupled with multi-material 3D printing].  Our first example is one of the simplest forms found in all engineering textbooks – the truss. Supporting a long span distributed load between supports at either end, the ghostly outline of a truss is still discernible, while its boundaries are not.  In a sense the distinction between bulk and reinforcement is blurred.
Diagram showing the distributed load on top and the two supports on either end plus the optimal shape of the reinforced region.
 
Using Objet Connex multi-material 3D printing, a fuzzy bone-like structure can be created showing the outcome of the topology optimization process. Here there is a gradient of eight transitions between Objet transparent rubber-like material and rigid opaque material.

The second experiment revisits the leaf as a structure. In nature, a leaf has to cantilever from its stem and carry its own weight while maximizing useful area. Therefore the familiar branching venation pattern of the leaf is the natural answer to this structural problem.  Using topology optimization for a slab, the same type of pattern emerges as seen in our example.  Again, the reinforcement is not just rigid material encased in soft rubber-like material [something that would be possible with traditional casting techniques] - but instead it is a cascade of nested materials of increasing stiffness and opacity.
Objet Connex 3d printed model showing the cantilevered load and support structure.

The ability to continuously vary the stiffness and transparency of the 3D printed material will allow us to rethink design techniques and technologies, software tools, and analysis methods beyond the surface modeling paradigm.  In the scale of product design this is already possible thanks to technologies like Objet Connex multi-material 3d printing.  Such experiments will be valuable precedents when speculating about new types of continuous and fuzzy building systems.
For more information about our research on 3D printed material distributions visit http://www.liftarchitects.com/journal/2012/5/28/printing-material-distributions.html
Multi-material 3D printing allows us to materialize semi-rigid and semi-transparent fuzzy structural systems as a kind of gradual reinforcement embedded in the material where the boundaries between softer and harder parts are blurred.

From Shoe Design to Finished Prototype in Just 2 Hours! (and 6 Easy Steps)

This is quoted from http://blog.objet.com/2011/08/04/from-shoe-design-to-finished-prototype-in-just-2-hours-and-6-easy-steps/ .

August 4, 2011

With a couple of hours to spare on a hot August afternoon I decided to have a go at printing a shoe sole on our new Objet260 Connex multi-material 3D printer. Here are the 6 steps I went through to produce my final model – taking just under 2 hours from start to finish:
Step 1 - I produce the shoe sole design on my CAD system. I want to produce a model with a rigid transparent sole and rubber-like treads to closely match the look and feel of the real thing. 


Step 2 - I export the CAD file to an STL file and then import the STL into the Objet Studio ready for printing. I then arrange how I want the shoe to be oriented on the build tray and which materials I want to assign to each part of the shoe. In this case I designate Objet TangoBlack rubber-like material to the tread shell and Objet VeroClear – a rigid transparent material to the sole shell.
With other prototyping technologies the two different shells – the treads and the sole would have to be printed seperately and then glued together by hand. Not so with the Objet260 Connex! Both shells – with their different material properties are printed in a single piece with no post-gluing required and no extra manipulation of the CAD files. All of this saves me a substantial amount of time and effort.
(Note that there’s space on this tray for many more shoe soles or any other 3D models – and you don’t have to be limited to the same material mix! You can mix up different material versions of various parts and print them on the same tray - all at the same time.) 
Step 3 - Print! Print! Print! (See the UV light on this Objet260 Connex machine which cures the Objet materials as each layer is deposited on the build tray.)


Step 4 - I then remove the completed model – encased by the support material.


Step 5 – I wash the soluble support material away in the waterjet.


Step 6 – Presto! I hold and test my finished multi-material shoe sole prototype just two hours after working the design on my CAD screen! If a designer is not happy with the final model it’s simplicity itself to tweak the design and print again.
In a single day you can go through many design and testing cycles that would have previously taken days or weeks to achieve using conventional prototyping methods. This is a true force multiplier for designers, engineers and manufacturers everywhere who want to build better products and get them to market faster in today’s ever-more competitive business environment.

DIY: 3D printing a custom iPhone case

This is quoted from http://howto.cnet.com/8301-11310_39-57482660-285/diy-3d-printing-a-custom-iphone-case/ .

DIY: 3D printing a custom iPhone case

In the latest episode of Always On, Sharon Vaknin dives into the world of 3D printing to find out what it takes to print a custom iPhone case.


July 31, 2012

(Credit: Sara Tew/CNET)
"If you can draw it, you can make it." In the realm of 3D printing, those are the words hobbyists and advocates share with prospectives poking around this young technology.
Easier said than done, but with a little practice, you really can fabricate almost anything on a 3D printer. Accessories, miniature figures, components for a project, smartphone accessories, tools -- these everyday objects can be materialized with 3D printing.
It's about as close to the Star Trek replicator as we'll ever get (at least in my generation).
In the latest episode of Always On, I ventured into the world of 3D printing to attempt to print my own, custom iPhone case. I went into this mission as a complete noob, without the slightest idea of how the printing process works.
Here's how CNET's Rich Brown describes the process in his "brief, brief overview of 3D printing":
  1. Acquire a 3D model file via download, by designing a model yourself, or by scanning a physical object.
  2. Send that file to the 3D printer, generally via your Windows, Mac, or Linux-based computer.
  3. The printer then draws from a spool of 1.75-millimeter or 3mm plastic filament, printing your design by building up layers of heated, extruded plastic.
  4. Bask in the glow of having brought into existence an actual 3D object.
With this in mind, I went to the TechShop in San Francisco and tackled my first-ever 3D printing project. Here's what happened:


Realistically, if you want to 3D print something, your process will be different. Unless you're doing some serious prototyping, or are an overachieving parent dedicated to only providing your child with 3D-printed toys, you will probably never own a 3D printer.
For one, they're expensive, starting at about $1,500 for a reliable model. But more importantly, owners are faced with routine maintenance, and must be comfortable with their 3D printer's mechanics and programming language.
Such circumstances are probably what have pegged 3D printing as a niche hobby that only serious geeks and prototyping entrepreneurs can tackle. However, at places like TechShop in San Francisco, people can use communal 3D printers with the help of an expert.
If you want to get into 3D printing, the increasingly popular option is to outsource the printing to a company like Shapeways. Once you design your print in a program like AutoDesk 123D, or find a premade one on site like Thingiverse, you simply upload your design to Shapeways and they'll take care of the printing.


Sharon Vaknin is a CNET How To expert who cooks up DIY projects, in-depth guides, and little-known tricks that help you get the most out of your tech. During her four years at CNET, she's covered social media, funky gadgets, and has shared her tech knowledge on CBS and other news outlets.

How to Get Started: 3D Modeling and Printing

This is quoted from http://www.popularmechanics.com/technology/how-to/tips/how-to-get-started-3d-modeling-and-printing .

How to Get Started: 3D Modeling and Printing

Thanks to an influx of easy-to-use software, 3D modeling isn’t just for engineers toiling endlessly on CAD programs anymore. New tools built with ordinary people in mind make it possible to design whatever parts or prototypes you can imagine, and bring them to life with the power of 3D printing.

By John Herrman

Petunia by Dolf Veenvliet
Shapeways

There was nothing wrong with Stijn van der Linden's screwdriver set, save for one thing: Years of use had worn away identifying marks from the handles. Tired of fumbling through a pile of tools every time he needed a No. 2 Phillips, van der Linden sat down at his computer. Using a PC program called 3ds Max, he created a complete 3D model of a labeled, ordered case, custom-fitted for his old tools.

When he was finished, he sent the file to his desktop prototyper, or 3D printer. About an hour later his tool case materialized in white ABS plastic. Everything fit perfectly.

Van der Linden, an electrical engineer by training, is admittedly not a beginner: 3ds Max is a professional 3D tool used to create, among other things, computer graphics for Hollywood films such as Iron Man and Avatar, and his 3D printer, the pp3dp Up, retails for more than $2500.

Nonetheless, he says, the appeal of DIY 3D modeling and printing is universal. "You're losing a lot of the limitations in the physical world," he says. "For my whole life, I always wanted to make stuff. Now I can make anything I want." It's true: An influx of easy-to-use software and on-demand printing services has made it possible for DIY-minded individuals—not just professional engineers—to render their designs, be they brand-new inventions or just hard-to-find replacement parts, in 3D and have them printed in plastic, glass, or even metal. Here's how to get started.

3D for the Masse


When most people think of 3D modeling, they think of CAD (short for computer-aided design). CAD conjures images of engineers toiling over green-on-black wireframes. This perception isn't entirely unfounded; 3D CAD modeling of the advanced, inscrutable sort has changed what it means to be an engineer and revolutionized everything from toy design to aviation. It has also been, until recently, almost completely inaccessible to civilians.

Today, though, 3D modeling has quietly opened to the mainstream. Free or affordable tools have emerged that are designed with ordinary people in mind.

More importantly, these tools have found real, practical roles. Some, like traditional CAD programs, help people—tinkerers, inventors, artists—visualize objects in three dimensions. Others simply help you plan a new room in your home or reconfigure an old one.

Getting Started


The biggest hurdle for would-be 3D-modelers isn't the price or the complexity of the software—it's the overabundance of options. There are pro-level modeling and rendering suites, finicky engineering tools, and simplified-to-the-point-of-uselessness art apps. In search of an entry point, I found an app called Tinkercad.

This free application runs inside a Web browser on nearly any PC or Mac and contains just the right level of functionality—it's capable enough for real 3D modeling, but not so complex as to put you off. It's a solid-modeling program—much like most professional CAD apps—which means that its models are an agglomeration of points in space rather than a hollow group of stitched-together polygons. With its emphasis on solid, volumetric materials, this type of modeling is particularly well-suited for 3D printing, and Tinkercad has a button that creates a 3D-printer-ready file instantly.

To get started, navigate to tinkercad.com and create a free user account. I was presented with a blank slate—or, in the parlance of 3D modeling, an open work plane. Building in Tinkercad is conceptually simple: In the Add mode, you select a shape—a box, a pyramid, a cone, or a cylinder—along with a size. You then stamp this shape into 3D space; clicking and dragging will stretch the shape as far as you want. The Sub (for "subtract") mode lets you use the same shapes for object removal. One of the easiest practical projects is a shirt button: With the Add tool, stamp a disc that's 16 mm wide and 2 mm thick. With the Sub tool set at 3 mm wide and 2 mm thick, stamp out two buttonholes near the center of the disc. That's it.

My first nonbutton project was admittedly a modest one: a POPULAR MECHANICS paperweight. It was to be about 4 inches wide, with a thick, 1-inch-deep base. Our trademark PM lettering would be perched on top. (Swap for your initials if you want to follow along.)

Modeling a shirt button takes about 2 minutes; my paperweight took a great deal longer—about an hour, including 15 minutes to get used to the app and no small amount of trial and error. Getting used to the stamp-and-cut behavior of the program was the biggest challenge; in its current incarnation, there's no way to move or resize an object—a block, for example—after it's been placed on the grid. Getting the spacing of the letters right took a few tries.

The core of the paperweight was composed of just seven shapes: one block for the base, four blocks for the M, and one block and a disc for the P. After creating the core, it was a matter of cutting, trimming, and adding accents. I subtracted small pieces of material from the middle of the M to match our iconic typography and carved out a hole for the P. I used small cubes to stamp serifs onto the letters and did cleanup with a 1 × 1—mm subtract tool. The end result was good enough. The next step was to make the paperweight real.

3D Printing


Popular Mechanics has devoted a fair number of pages in the past few years to a company called MakerBot, whose 3D printers can create small, plastic prototypes in just a few minutes—all they need is a healthy supply of ABS plastic and a 3D-model template from a program like Tinkercad. MakerBot's machines are affordable, but only relatively: At $1000, they're far cheaper than industrial prototyping machines, but out of reach for most hobbyists—including me. Plus, I was making a paperweight, and MakerBots print only in plastic. I wanted something with heft—glass or stone or even metal. That's where Shapeways, an on-demand 3D printing service, came in.

Sending my model to Shapeways was a two-step process: From Tinkercad I exported my project as an STL file, the industry standard for 3D printing; at shapeways.com I just clicked the Upload button on the front page. Ten minutes later, I got a message saying that my model had been approved, and I was presented with nearly 20 choices of materials. For $25, I could have the project printed in ceramic. For $930, I could have it cast in sterling silver. I made my selection (sandstone, $36) and I would have my paperweight within two weeks. I've already chosen a followup project: Ever the picky tech editor, I'm custom-designing a case for my smartphone.

Advanced Prototyping


Software for 3D modeling ranges in price from free to thousands of dollars and varies hugely in complexity. Tinkercad is a fantastic starting point, but you'll hear a lot of other names when you dive into the world of 3D modeling.

SketchUp, by Google, is a popular program by virtue of its tie-in with the company's 3D-mapping program, Google Earth. (Google encourages users to populate its virtual maps with 3D replicas of real buildings.) Blender, another free program, is an open-source alternative to professional programs such as 3ds Max. It's versatile—there's really nothing you can't do in Blender—but it has a steep learning curve.

The app 123D, new from Autodesk, the company that makes the industry-standard professional CAD software, is a well-balanced tool kit for intermediate 3D-modelers and connects natively with Shapeways for easy 3D printing. Once you're comfortable in a program like Tinkercad, you can find your way in 123D.

There's room to grow with Shapeways as well. Once you're satisfied with your design, you can list it for sale on the site. You choose the material options and markup, and they handle the ordering, printing, and shipping. "Three-D modeling started as a hobby," says van der Linden, but after launching a product line that includes kinetic toys, geometric sculpture, jewelry, and desk lamps (Shapeways can print objects up to about 27 × 15 × 22 inches), it's quickly becoming a healthy source of income.

Roman Vasyliev, a freelance designer, had been building model cars and airplanes for years before discovering 3D printing. His obsessively detailed World War I—era aircraft models now net a steady stream of income. (The top seller is a 1:44-scale model of the Caudron G.4, a French biplane bomber.) "I was really surprised that 3D modeling has become another branch of my hobby," he says, "and now, my work."

Modeling and printing in 3D has everyday applications, too. In an hour or two, Tinkercad or 123D can help you replace that once-irreplaceable knob on your priceless old guitar amp, for example. Last year a man named Duann Scott asked the manufacturer of his high-end baby stroller, Bugaboo, for a part to repair a broken hub lock. When the company said it would charge $250, he scoffed. Scott took apart the hub, figured out what he needed, modeled the parts on his own, and had them printed in stainless steel. Total cost: $15.

ReplicatorG is a simple, open source 3D printing program

This is quoted from http://replicat.org/start .

This is the software that will drive your MakerBot Replicator, Thing-O-Matic, CupCake CNC, RepRap machine, or generic CNC machine. You can give it a GCode or STL file to process, and it takes it from there. It's cross platform, easily installed, and is based on the familiar Arduino / Processing environments. ReplicatorG is used by thousands of MakerBot Operators, and has printed tens of thousands of objects and counting.

ReplicatorG 0037 Released June 22nd, 2012

(RepRap5D users, please use ReplicatorG 34 for 5D when using 5D)
New Features:
  • Bugfix for comb in skeinforge
  • Lowered The Replicator:Accelerated temperature
  • Changed start gcode to handle Firmware 5.5 stepper power bugfix
  • Updated for acceleration behaviour
  • Updated to have temperature as part of PrintOMatic settings
  • Updated for smarter acceleration related configuration
  • Added Slic3r and Miracle Grue engines, engine editors, etc
  • Updated to handle accleration for The Replicator
  • Updated t0 to t1 tolerance code
  • Other Firmware 5.5 compatiblity updates

ReplicatorG 0034 Released March 13, 2012

(This version is not working with RepRap5D, please use ReplicatorG 34 for 5D when using 5D)
New Features:
* Updated toolhead offset t0 to t1 code to store offset of out of tolerance
* Tools directory location sourcing updated to fix avr-dude on mac problems.
* Toolhead start heating gcode updates for faster heating-up on slow HBP's
* Fixes and updates to alternative preferences system.
* Ant run command line commands support
* Expected Toolhead offset stored as part of machine settings
* Spelling mistake fixes
* Updated print anchor code

ReplicatorG 0033 Released Feb. 27, 2012

New Features:
  • Added a Windows and Mac installer.
  • Added initial support for The Replicator (from MakerBot Industries)
  • Updated start and end gcode
  • Fixed dual extrusion bugs
  • Support for skeinforge 47 with The Replicator.
  • Updated Support for skeinforge 35 for Cupcake CNC and Thing-O-Matic
  • Extensive Rewrite of RepG to support The Replicator
  • Post Processing of Skeinforge changes added
  • Start and end gcode can now be specified from machines/*.xml
  • Dualstrusion refactored, Wipes are not currently supported
  • Estimator and safety checks pulled into different thread
  • Improved UI for safety checker
  • Machine Onboard Parameters and Toolhead Onboard Parameters merged
  • New GCode for new Replicator FUNctionality! M70-M73
  • Improved temperature polling
  • GCode now prepended with some meta-info

ReplicatorG 0029 Released Dec 11, 2011

New Features:
  • Added 'Reset Defaults' for Print-O-Matic settings
  • Added Mk6 and Mk7 defaults for Print-O-Matic
  • Updated and simplified some number parsing
  • Updated Onboard Parameters dialog
  • Added data to start.gcode and wipe to help users modify
  • Changed handling of JFormattedTextField

ReplicatorG 0028 Released Nov 28, 2011

New features:
  • Fixed toolhead setting function to work with new and old firmware
  • Improvements to localization of decimal numbers
  • Fixed preferences window, only one can be open at any time
  • Fixed description of wipes in Dualstrusion window
  • Disabled 'swap toolhead' while build in progress
  • Removed 'Print to SD' button because it was slow, buggy, and rarely used
  • Removed various bits of old, unused code from the top bar
  • Added 'Generate GCode' button to top bar
  • Changed functionality of 'Build' button, it can now genrate gcode and build in one click
  • Improved temperature monitoring
  • Added machine info to the machine status bar (green/red info bar)
  • Added 'Preheat' function to bring bot up to temperature,
  • Added preheat temperature settings to preferences
  • Extensive cleanup of some DualStrusion code
  • Fixed 'move' tool layout
  • Minor improvements to ConfirmationDialog code
  • Updates to Dualstrusion HBP behavior
  • Clarification of several text panels
  • Added Warnings on Extruder Dialogs that have side effects in Dualstrusion
  • Fixed pre-heat temperature not setting in preferences panel
  • Added heat range warnings to pre-heat temperature setting
  • Fixed bug from Alpha that prevented print-from-stl use in some cases
  • Fixed bug in extruder and mobo preferences that caused float num errors
  • Updated so locale formats work in Java 5
Download it today!

Screenshots

flickr:4816221018 Model manipulation in ReplicatorG 0018
flickr:4710345086 STL preview in ReplicatorG 0017
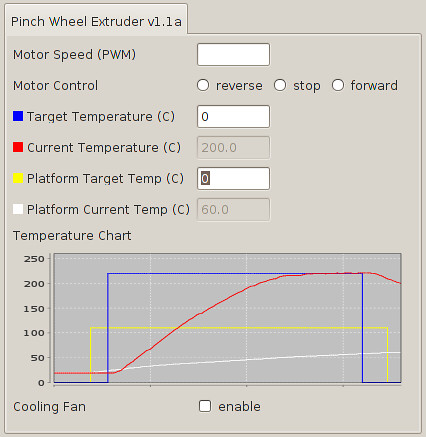
flickr:4604290256 The temperature graph in ReplicatorG 0016

Thursday, September 20, 2012

South Korean software mogul Ahn Cheol-soo(AhnLab founder) to stand for presidency

This is quoted from http://news.yahoo.com/south-korean-software-mogul-stand-presidency-140400905--finance.html?_esi=1 .

South Korean software mogul to stand for presidency

SEOUL (Reuters) - South Korean software millionaire and philanthropist Ahn Cheol-soo finally announced he would run for the presidency, ending a year-long wait and throwing wide open a race that had looked to be a coronation for the conservatives' Park Geun-hye.

Vowing to tighten up on big business, which he has accused of treating employees like caged animals in a zoo, the youthful-looking 50-year old said on Wednesday he would create jobs for young people and share wealth and opportunities in the world's 13th largest economy.

Ahn has donated more than $200 million of his wealth to charity and is seen as the only candidate capable of derailing Park's goal of becoming South Korea's first female president, and the two are neck-and-neck ahead of the December 19 polls.
"The people have expressed their hope for political reform through me. I want to become the person who puts that hope into practice," a visibly emotional Ahn told a cheering crowd in a hall in Seoul, the capital.

After he declared his presidential bid, Ahn surged to a lead over Park in the polls.
According to a poll by JTBC, the television arm of Joongang Ilbo newspaper, and pollster Realmeter of 1,500 respondents, Ahn had the support of 48.3 percent against Park's 42.5 percent in a two horse race. That was a gain of 3.8 percentage points for Ahn from the previous poll and a loss of 2.2 percentage points for Park.

Standing in front of a giant banner reading: "A new change chosen by the people is about to start", Ahn said he would push for political reform to open economic opportunities in South Korea, an Asian industrial powerhouse.

"The economic democracy and welfare policy that are being discussed currently must lead to economic innovation by combining growth momentum of our economy."
Ahn is standing as an independent and will need to cut a deal with the official opposition candidate Moon Jae-in to avoid splitting the anti-Park vote, although he did not offer an alliance in his speech on Wednesday.

Ahn has never held political office, while Park has lead the ruling conservatives and is the daughter of South Korean dictator Park Chung-hee.

She stood in as First Lady after the assassination of her mother in 1974 and only moved out of the presidential palace in Seoul after her father was gunned down in 1979 by his security chief.

The software entrepreneur turned college dean has broad support among people in their 20s to 40s and urban workers, who are likely to be the swing voters in the December polls.

"I believe the decisively important thing for sustainable growth is to build a welfare state," Ahn said in a book published this month.

He also said big business abuse of market power should be stopped, possibly by a new law aimed at regulating the chaebol, the family conglomerates that dominate the economy.

"I don't think we should be ambivalent about chaebol. We should introduce a 'corporate group law' to ensure they remain competitive but try to minimize their defects and abuses."

AN OUTSIDER
Ahn, a softspoken man of slight build with a trademark mop top haircut, founded the online security firm Ahnlab in 1995 after spending seven years developing anti-virus software while completing medical training and working full time as a physician in Seoul.

Ahn's "Youth Concert" tour last year that took him through college campuses was a smash hit with young people, with their combination of criticism of the political status quo and life lessons from someone who has had three successful careers.

Ahn portrays himself as an outsider, although critics note that he has been on the board of POSCO, a huge steel company, founded by Park Geun-hye's father in his drive to industrialize the then-impoverished country.

He faces questions over whether can prove himself a viable candidate due to his lack of political experience and whether he can withstand the bruising process of a high-profile campaign.

Half the people in a poll conducted in May said Ahn should not enter politics and more than two-thirds of them said he should remain a neutral bystander.

While he is seen as a liberal on many social issues, Ahn has vowed a tough stance on North Korea, which remains at war with the South after the 1950-53 Korean War ended in an armistice.

Both he and Park, whose mother was assassinated by a North Korean-backed assassin, have sought to distance themselves from incumbent Lee Myung-bak's hardline stance on the North.

"Some people ask what makes you think having run a small business prepares you to run an administration at a much bigger scale," Ahn said in an interview last year.

"I just laugh when I hear people say that ... I created something from nothing, I've overcome hardship."

(Editing by Jonathan Thatcher and Ron Popeski)

Monday, September 10, 2012

Connected Cars Could Become Security Threat

This is quoted from http://cmvlive.com/technology/connected-cars-security-threat .

Connected Cars Could Become Security Threat

Published On: Wed, Aug 22nd, 2012
 
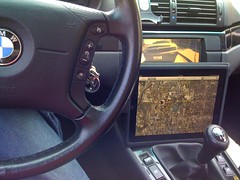
iPad as a Carputer
iPad as a Carputer (Photo credit: Yutaka Tsutano)

The benefits of advanced computing technology are legion, but many of those myriad benefits come with serious security caveats. With the advent of the computer came the advent of the computer virus. The Internet ushered in a new digital age that included among its emergent features several pandemic worms and the specter of cyber warfare. The threats are real and the potential damages so severe that almost every susceptible machine now comes equipped with some kind of anti-virus or digital security software.
As technology becomes integrated in more and more devices, experts have seen the rise of malware designed to threaten atypical targets. Videogame consoles, web TVs, MP3 players and home security systems are only some of the many web-connected devices that have been infiltrated by innovative hackers with novel code. Experts in the automotive field are now concerned that the same kind of malicious software could be developed to target computing software in smart cars.

Cars, like all other pieces of technology, have been changed forever by the digital revolution. Instead of electrical systems, most contemporary vehicles rely on complex computing systems called ECUs. These ECUs depend on millions of lines of code to operate everything from your navigation system to your engine and brakes. These complex computing systems, experts say, are exactly the kind of interconnected systems that are most susceptible to cyber attacks.

Wireless technologies integrated in many new vehicle models are especially vulnerable to remote hacking. Experts speculate that these attacks could cause a range of harm, having effects as innocuous as baffling a climate control system to causing catastrophic damage to an engine or other essential part.

McAfee is a computing company that operates under the Intel umbrella. They’re responsible for the security software that most often treats infected PCs. The people at McAfee have begun research on vehicle cyber security out of a facility in Beaverton, Oregon. Senior McAfee executive Bruce Snell confirmed to the press that automakers are just becoming aware of their vehicles’ digital vulnerabilities. His company issued a recent report on automotive systems security titled, “Caution: Malware Ahead.” The report forecasts dire consequences if automakers don’t make an effort to stay one step ahead of hackers.

Two teams of researchers working out of the University of Washington and the University of California-San Diego have already developed malicious code that targets modern vehicles. The experts working out of those two schools managed to infiltrate a car’s navigation system from a remote laptop. Another research team at the University of South Carolina and Rutgers University in New Jersey demonstrated the ease with which a competent hacker could stage a cyber attack on a vehicle by compromising the RFID tags in tires.

None of the studies were vendor specific. The experts at McAfee caution that this problem is relevant to every manufacturer in the industry. It would be counterproductive, they argue, to single out a single company for failure to protect their vehicles’ computing systems. Everyone, apparently, needs to do more.

If this problem bears fruit in the coming years, drivers may see a spike in car insurance rates to cover the risk of damage from cyber attacks. If you’re interested in how much it would cost you to switch to a higher tech vehicle, get a free auto insurance quote online.